This article is based on the talk I gave at iOS Astronauts meetup that was held on 03.10.2018 at Babylon. You can check out this talk and other videos as well as join the meetup group here.
Probably every iOS developer nowadays knows what UI tests are and how to write them. Sometimes we don't even have to write them ourselves because Xcode can do that for us. Of course, the result is far from ideal and probably you don't want to keep it as it is in your tests, but point is that it's not hard to write a code that will tap a button on a screen.
What's hard is the issues you start to face when you write more and more of such tests.
In this post, I'll be highlighting some of the issues we face with UI tests at Babylon. Mainly they are related to:
- unexpected tests failures
- tests performance
- the complexity of some scenarios
Content stability
One of the main reasons for our UI tests suite failures is a frequent change of content that we don't control (of course after our own changes to the codebase). The best example of that is our chatbot. It works the way that you can ask our chatbot any question and in return, it asks you to answer some more questions so that it can give you better results. Some of these questions will expect you to choose an answer from a set of provided options or give a free-form answer. Depending on your answer chatbot may ask a different question next time. These flows are defined by the backend AI service and are absolutely opaque for the app - with rare exception we don't know what is the difference between one or another option. And from time to time these flows change and for example instead of answer option that says "OK" we receive "SURE". And UI tests start to fail because they can't find a button they expect.
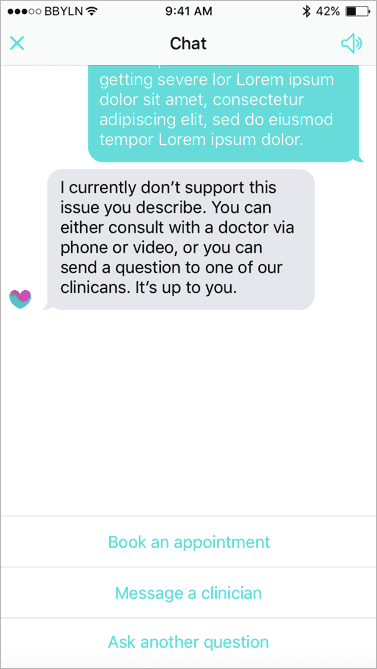
In some cases, we could probably use unique identifiers of the answer options as accessibility identifiers. And it would work for such simple cases where semantics doesn't change. But as we don't control these flows we have no knowledge about the nature of these changes and we might as well receive completely new elements that we know nothing about. Or the flow might change and instead of asking question A and then question B the chatbot will first ask question B, or even C and only then question A. That makes testing these flows on the client side particularly unstable.
External system actions required
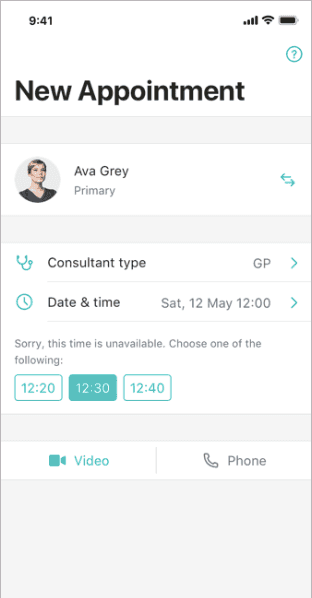
Another issue is that some of the user scenarios in our app require not just user interaction but also GP interaction in a system we call "GP Portal". For example, when a user books an appointment with a GP it will only start when GP initiates it and the app receives a call. The same with completing an appointment. It actually does not complete automatically when you or GP hang up. After that GP may have to do few things on the GP Portal and only when they are ready they complete the appointment. That's like your Uber driver completes the ride. Only then the app receives a push notification for example that you have a prescription or asking you to rate the appointment. So as you can imagine these scenarios are pretty cumbersome to test manually as well as hard to automate.
Network stability
Another very common reason for tests to fail is the network stability. It's not just about how good is a Wi-Fi signal in the room with your test devices, it's about everything that can happen when you are doing network calls, 500 responses, timeouts, connection drops and so on. And when your tests are running in the cloud, like ours, you have even less control of that.
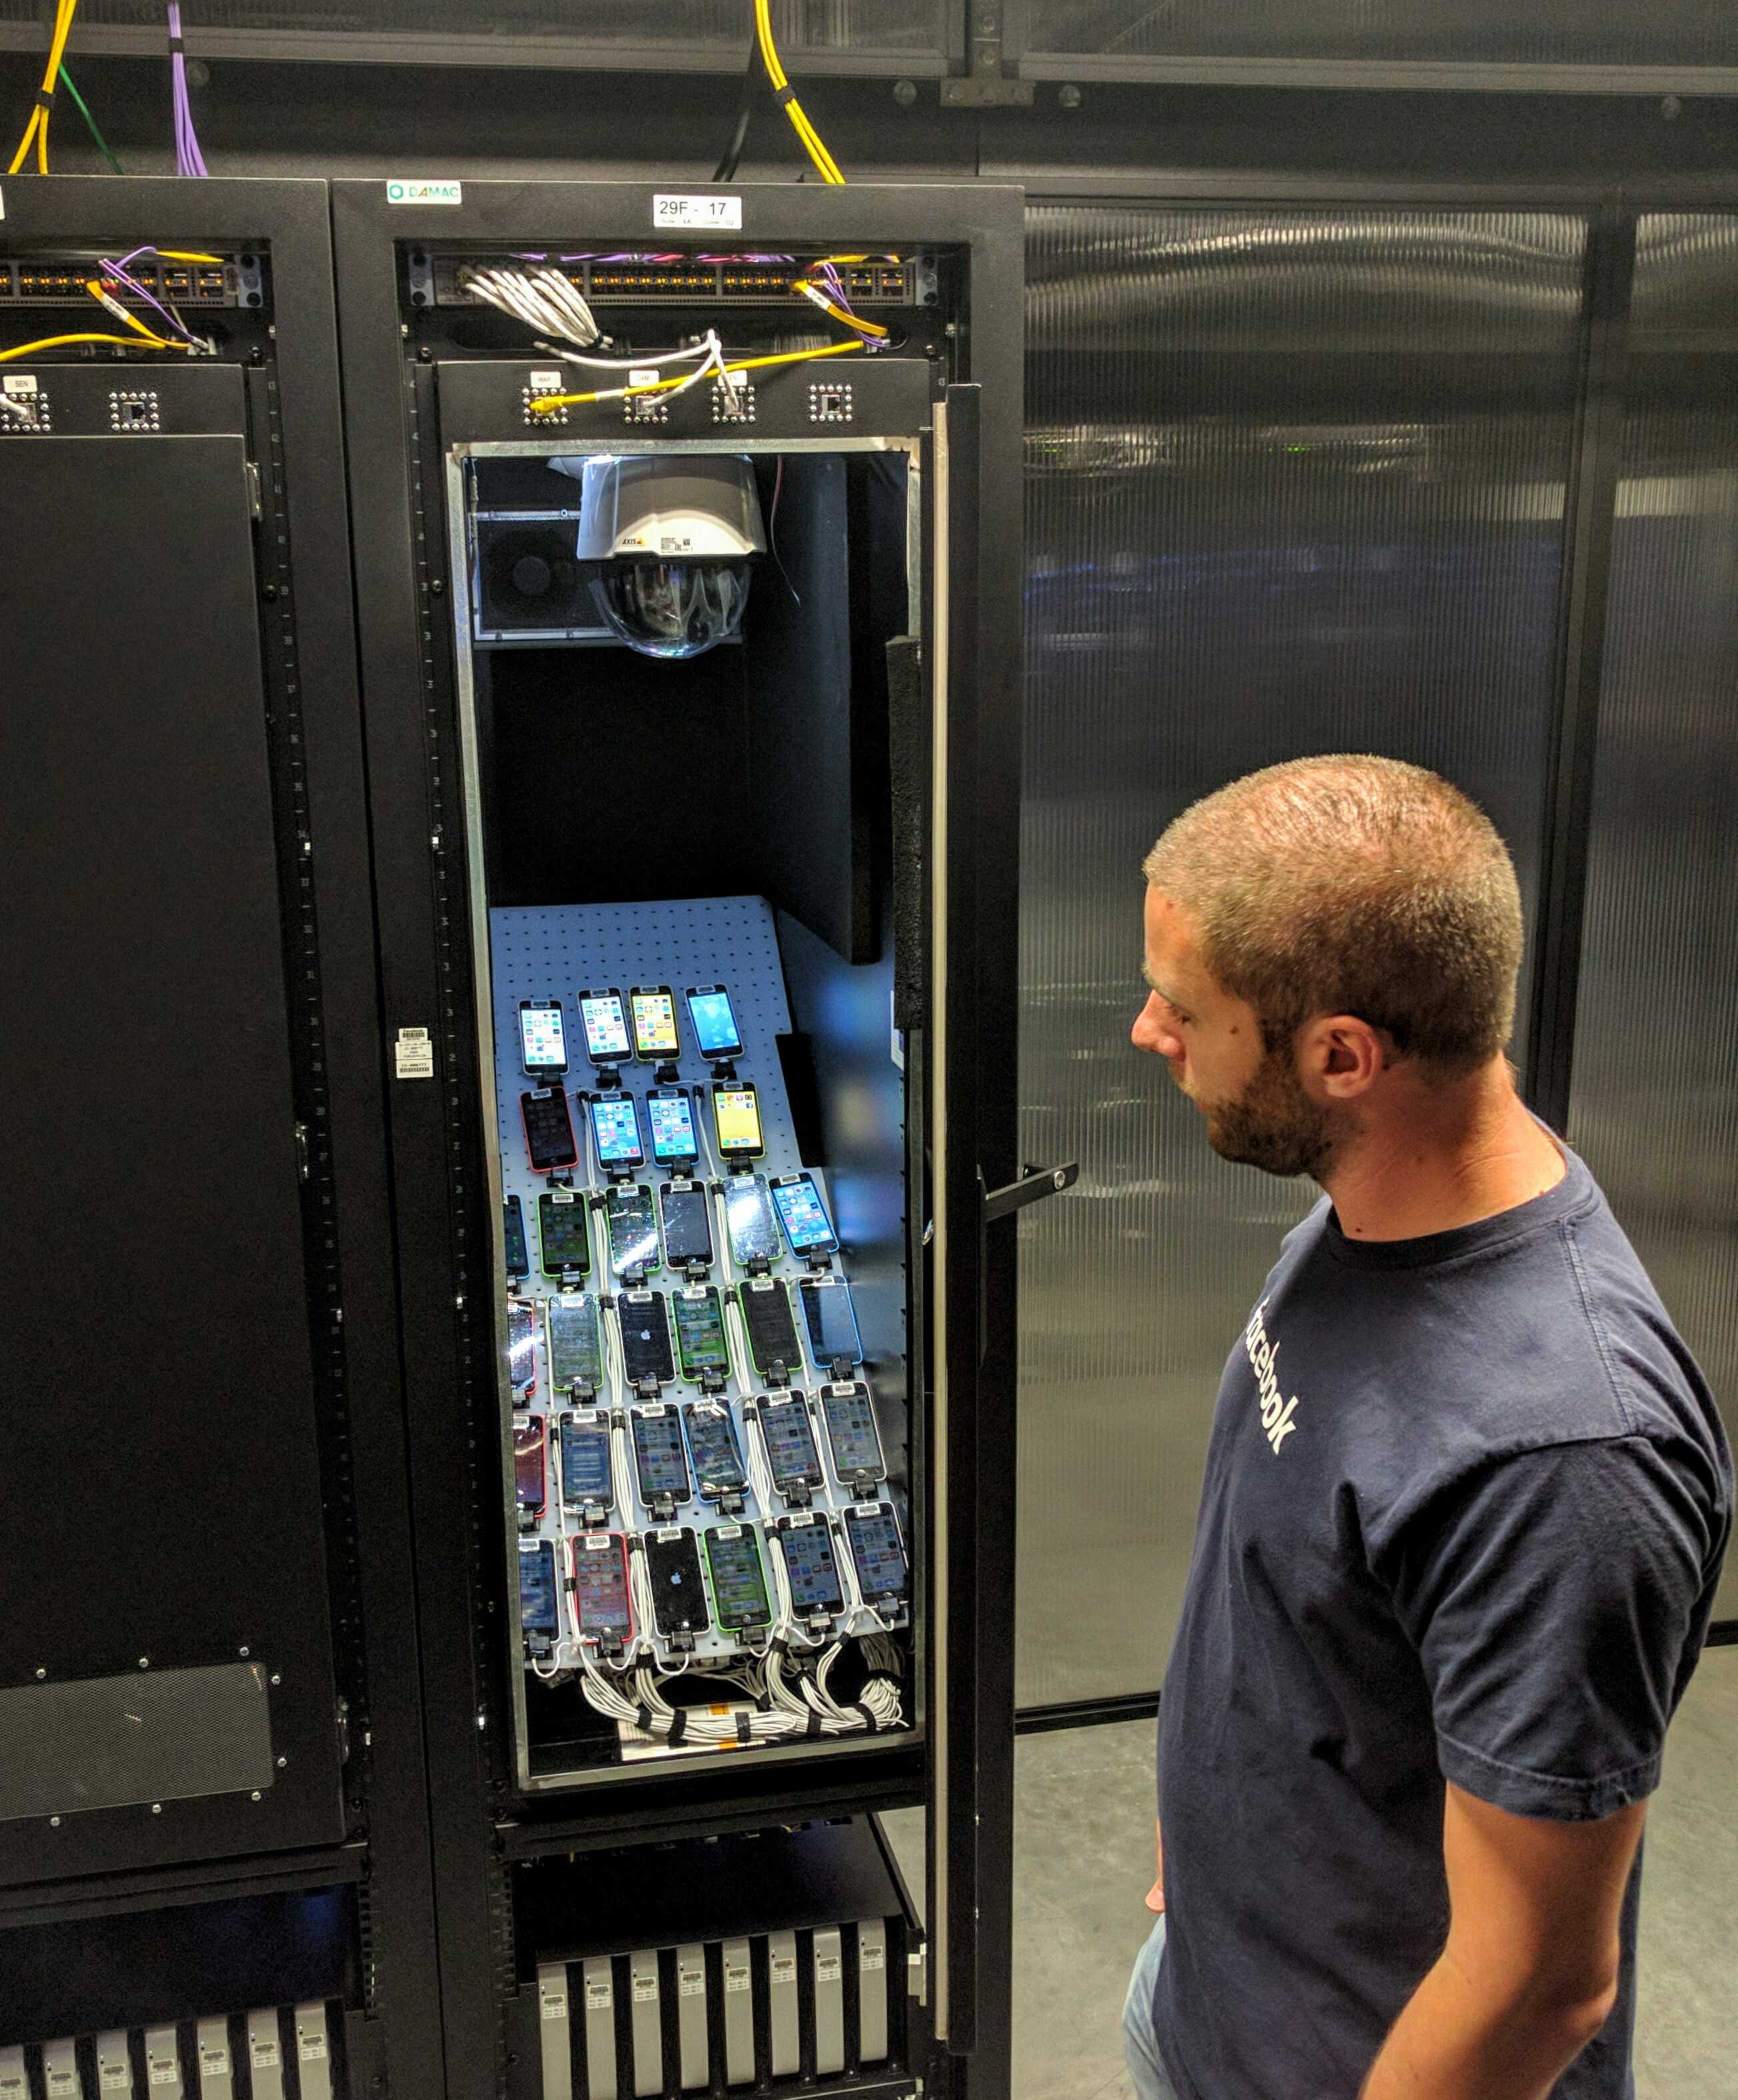
Sometime people go extreme and build racks for test devices with their own WiFi signals and then have to add electromagnetic enclosures to isolate them to avoid networking issues.
Performance
This brings us to another issue which is related to the performance of tests. Not just a device or simulator performance that also might vary and be unpredictable, but also the need to perform extra steps to reach a point of interest in the app. For example, every test needs to start from registering a new user because we want our tests to be isolated from each other. Then all tests related to appointments flows need to schedule an appointment, add a payment method, confirm payment and so on. This leads to a lot of tests going through the same steps over and over again.
And then we face a dilemma - either we can group such scenarios together and have fewer tests but make them larger by asserting more expectations in each test which will make each test longer to run but will speed up whole test suite, or we could make tests smaller, more focused but run the whole tests suite for a much longer time because of more repeated steps.
How do we solve that?
Now when we know the problems let's look at their solutions that we try to apply. Some of these things we are already doing, some of them we plan to do in a near future, some are still just ideas.
Basically, our strategy is built around an approach that can be summarised as "control the world". By the world, in this case, we mean everything outside the app, which is the network, and everything inside the app, which is the app initial state (the runtime state is already controlled by the test)

What does it mean to control the network? It means that our test instead of some backend services have full control over what data our application receives when it makes network calls.
How can we do that? This is a very trivial thing to do in unit tests, there are few well-known ways of doing that, from using dependency injection and network mocks, to using custom URL protocols to serve stubbed data. It's simple because unit tests and the code they test are running in the same process, so they can access the same network stack, modify it or completely replace it.
But when we are running UI test we have two processes running in parallel - application process and test runner process - with two separate network stacks. That makes it a bit trickier to affect the network stack of the app from the test runner process.
There are few ways to achieve that though. One is from the inside of the application process, and another is from the inside of the test runner process.
Control the world from the inside of the app
When we are doing that from the inside of the app we do it the same way as in unit tests, either by injecting mock network stack or using custom URL protocol to serve stubbed data. The most common is to use a URL protocol. The idea is that the URL protocol allows you to intercept all network requests and pass back stubbed data. There are several open-source libraries that make this very straightforward but when it comes to using them with UI tests there are few issues.
First, you need to integrate some test related code into the app code. The problem is not that you have to do that, most likely you'll need to do that anyway for one or another reason. The problem is in the amount of that code and how well it is isolated from the rest of the app and what it will allow you to do. And even if it is isolated - it's still in the different target than tests.
Next, you will have to somehow instruct the app what stubs to use. This is usually done via launch arguments as it is the only way that we have in UI tests to alter the app behavior. This approach is not very flexible when it comes to passing through something more than a few strings or JSON objects, but it might be enough just to pass the name of the test that is currently running so that the app can pick up the correct network stubs stored in a bundle.
let body = [ "user": "Kyle" ]
stub(uri("/{user}/{repository}"), json(body))- straightforward ✅
- integrates into application code ❌
- not very flexible ❌
Control the world from the inside the test runner
Another way of controlling the network is from inside the test process. For that instead of making requests to a backend service, the app makes requests to a local web server that is running on the localhost and is controlled by the test code. The test then decides what to do with the request - return some stabbed data, redirect it to the real service or maybe return an error. Possibilities are basically endless and can satisfy all the needs that you can possibly imagine, unlike the previous approach where it's harder to synchronize between the app and the test. You can use it to simply log all network requests and responses to attach them to tests results to improve debugging experience. Or you can use these logs as snapshots and run your tests against these snapshots instead of the real network. Or you can even implement a mock backend and never talk to the real services.
This approach also requires some integration in the app, but most likely you already have everything that you need for that. There is more work to be done on the test target side though, but its much better isolated from the app. That's another benefit of this approach - most of the code will be in the tests target, inlined into your tests so you will not need to jump between code in the app and tests.
override func setUp() {
  server.start()
  server.router.notFoundResponse = InterceptResponse()
}

override func tearDown() {
  server.stop()
}- harder to setup ❌
- integrates into the test runner ✅
- very flexible ✅
Local server setup - in the app
So what we need to do to make our tests work with the local web server? First of all our app needs to be able to switch to a localhost. If your app supports switching between backend environments like develop, staging, production then you simply need to add one more environment for localhost. If not - you need to implement that but it's pretty trivial and anyway is a good thing to have.
In our case, it required a little bit more work because our app uses multiple backend services which are located on different hosts, so we can't just replace one host with a localhost, we have to somehow keep the original host of the request. We do that by putting it in the first path component of the request. Then in the test, we can extract it and make a real request to this host if we need.
public static func local(_ env: Environment, host: String) -> Environment {
  return Environment(
    name: "localhost",
    endpoints: Environment.Endpoints(
      app1BaseURL: URL(string: "http://\(host)/\(env.endpoints.app1BaseURL.host!)")!,
                             // http://localhost:8080/dev.api1.com
      app2BaseURL: URL(string: "http://\(host)/\(env.endpoints.app2BaseURL.host!)")!,
                             // http://localhost:8080/dev.api2.com
      webAppURL: env.endpoints.webAppURL
    )
  )
}
Second, and the last, if you use TSL you will need to enable local networking for the app, which is done by adding a single key in Info.plist file.
if [ "${CONFIGURATION}" == "Debug" ]; then
    /usr/libexec/PlistBuddy -c "Set NSAppTransportSecurity:NSAllowsLocalNetworking YES" "${TARGET_BUILD_DIR}/${INFOPLIST_PATH}"
fi
Local server setup - in the test
On the test runner side, you need to do a bit more. First of all, you need a web server implementation of course. But that's not something you'll have to write yourself, there are open-source solutions that have been available for a while, like GCDWebServer, swifter, Kitura, or if you want you can implement your own based on SwiftNIO.
What implementation you use does not really matter, some of them are easier to set up than others (for example I couldn't go through Kitura HelloWorld tutorial) but they basically work the same way. We currently use a small web framework called Ambassador that works pretty well even though it is relatively unknown and gives us everything we need for testing purposes and nothing extra that we don't need.
class MockServer {
  func start() {}
  func stop() {}
  func setupRoutes() {}
  func startRecording(testName: String) {}
}

class MyTest: XCTestCase {
  override func setUp() {
    server.start()
    if runsAgainstMockServer {
      // local server mocks backend
      server.setupRoutes()
    } else server.config.recordingMode != nil {
      // "snapshot" tests
      server.startRecording(testName: testName)
    } else {
      // local server as a proxy
      server.router.notFoundResponse = InterceptResponse()
    }
  }

  override func tearDown() {
    server.stop()
  }
}
Next, you need to intercept the requests from the app using this web server. The web frameworks already provide all functionality for that, usually through the concept known as "router". Basically, this router holds a mapping between URL patterns and functions to handle them. In any web framework, it can be done by registering a handler for all incoming requests. This handler when invoked parses the request and then we can decide what to do with it. For example, we can redirect this request to the real server using URLSession, get the response and then send it back to the app.
import EnvoyAmbassador
import Embassy

struct InterceptResponse: WebApp {
  func app(
    _ environ: [String: Any],
    startResponse: @escaping StartResponse,
    sendBody: @escaping SendBody
  ) {
    let env = RequestEnvironment(environ)
    let request = env.request
    session.dataTask(with: request) { data, response, error in
      self.complete(env, request, response, data, startResponse, sendBody)
    }.resume()
  }
}
Local server edge cases
Before we continue to how we use the local web server in our tests, there are some interesting edge cases that we faced when using this approach.
First is running parallel tests in simulators on the same machine. When you are starting a local web server it needs to listen to a specific port, i.e. 8080. But if this port is already taken by another instance of a web server that is running on the same machine and was started from another test, you can't use the same port. For that, we simply pick up the next port until we find one that is free.
Next edge case is that our backend sometimes returns us absolute URLs to some resources instead of relative URLs. In this case, we have to override such URLs to point them to localhost so that when the app access them we can intercept them too. But we have to be careful about that, for example, we can receive an URL that contains another URL in its query parameter. So when we were simply replacing all http:// with http://localhost we were also changing those URLs. And then we ended up with URLs in query parameters like http://localhost:8080/www.nhs.co.uk/ instead of just http://www.nhs.co.uk which real backend services can't understand. We solved that by replacing URLs pointing only to our hosts and ignore all other hosts.
This resulted in another issue - when we change the content of the response, its size changes and so we also have to change corresponding HTTP headers of response, so that application network stack is not confused and can properly read all response data.
There might be others that we just haven't faced yet, but so far they were easy to solve and flexibility that local server provides outweighs them.
Local web server use cases
Now let's talk about how we are using the local web server in our tests. We do it in all different ways that this approach allows.
In the simplest case, we redirect all requests to the real services and simply log requests and responses. This already gives us a useful insight into why the test may misbehave, is it because request failed or it returned some data we didn't expect. And we don't have to switch between app and test logs, everything now is in one place.
We also use these logs as recordings, or snapshots, so that we can replay tests later without reaching real services. This is very similar to snapshot tests that you may write for your UI components. Each test can be run either in record or replay mode. In record mode, our web server redirects all requests to real backend services and writes responses in a file. In replay mode, it reads from these files.
And in some rare scenarios, we use the web server to completely mock the backend.
Network session recording
Let's talk a bit more about network session recording. When a local web server receives a request from the app it makes a similar request but to the real web server. It does it using plain URLSession. Because of that, we can record all network interactions easily by injecting into our web server a mock URL session that handles all recording and replaying logic.
There are again several open source solutions for that, like DVR, but we are using one that is called Vinyl and was actually developed by our team members. In practice, it worked much better than DVR and is much easier to use.
func startRecording(testName: String) {
  // detect recording mode
  let recordingMode: RecordingMode
  if case .record? = config.recordingMode {
    recordingMode = .missingVinyl(recordingPath: recordingPath)
  } else {
    recordingMode = .none
  }
  // configure matching strategy
  let matchingStrategy = MatchingStrategy.requestAttributes(
    types: [.method, .url, .query, .body],
    playTracksUniquely: false
  )
  // create URLSession mock
  recordingSession = Turntable(
    vinylName: vinylName(forTest: testName),
    turntableConfiguration: TurntableConfiguration(
      matchingStrategy: matchingStrategy,
      recordingMode: recordingMode
  ))
  router.notFoundResponse = InterceptResponse(session: recordingSession!)
}
Recording network session is pretty straightforward but when it comes to replaying them there are two interesting problems we have to solve.
First one is random test input. Each of our tests starts with registering a new user. For that, we use randomly generated emails. And there are several other places where we generate random data, i.e. symptoms when booking an appointment. This random data then will be submitted in a body of a network request.
Now when we replay these network requests we need a way to match previously recorded requests with new incoming requests. If we match them only by URLs we are risking to match wrong requests in the case when there are similar requests with different bodies. So we match everything - HTTP method, URL, query parameters and body data. But then when we replay the test and it uses a different random input than what was used in recording we will not find a match because its body will be different from what was recorded before.
To solve that we simply store all random strings that test generates in a file next to network logs and then in replay mode read from it. This way when we replay test we use exactly the same input that was used when this test was recorded.
let matchingStrategy = MatchingStrategy.requestAttributes(
  types: [.method, .url, .query, .body],
  playTracksUniquely: false
)

func generateRandomString(length: Int, key: String?) -> String {
  if server.config.recordingMode != nil, let key = key {
      return randomStringFromFile(length: length, key: key)
  } else {
      return randomString(length: length)
  }
}
Another problem is similar to random input data - it's a current date. For example when user books an appointment our backend returns us available time slots. Then before submitting a book appointment request, we are checking if a selected time slot is actually in the future.
Now imagine that we replay this scenario against network recording made yesterday. All time slots will be in the past so the date check will fail and we will treat all of the time slots as expired. To solve that we need our app to use a custom date factory instead of default Date constructor that in tests returns the current date as a date of recording.
extension Date {
  static func now() -> Date {
    #if targetEnvironment(simulator)
    return Date(fromLaunchArguments: CommandLine.arguments)
    #else
    return Date()
    #end
  }
}
Mocking backend
The last use case for the local web server that we use is to completely mock the backend. This is useful for scenarios that we can't test only using the app and which require some actions on GP portal, i.e. prescriptions flow. For that, we need to have a prescription created on a backend. But instead, we can mock the endpoint to get prescriptions and return stubbed prescription. Or the scenario of registering with Facebook. For that, you need to have a test facebook user. But you can use it only once to register on a real server. We could create new test users in each test via Facebook API but this is very slow and we are introducing another point of failure that we can't control. Instead we use a single test user that we use to log in with Facebook in a browser and then we use a mock implementation of registration endpoint that we configure based on the test scenario - it can either return successful response or return an error so that we can make sure that the app reacts correctly on all responses.
The main problem with this approach is that you need to mock everything. As soon as you mocked one endpoint, i.e. that returns fake authorization token or fake prescription, you can't make any requests using this data to the real backend because it will not know anything about this fake data. You don't have to reimplement all backend logic though, instead, you can just configure it to be in a specific state, i.e. have an upcoming appointment for the user or have a completed appointment with a prescription. So the logic that you need to implement boils down to doing CRUD operations on collections of data using queries based on incoming requests. And this can be implemented in a pretty neat way.
func setUp() {
  server.router["patients/", .number()] = server.get(\.patients, by: \.id)
}

func test() {
  server.patient = PatientDTO.mock()
}
Another thing you'll need to implement is Encodable on your data models. In the app, most of your data models need to implement only Decodable, but to send them to the app from a mock server you need to decode them. If your models are simple or use tools like Sourcery you can get this boilerplate for free either relying on compiler generated implementations or code generated by Sourcery. Otherwise, you need to write this boilerplate code.
So as you can see it requires more work (that can be trivial though) for each test comparing with snapshot tests. For that reason, we will most likely use snapshots approach going forward and only use mocking when there is no other option.
- mock everything ❌
- boilerplate code to write ❌
- total control ✅
Network and content stability? ✅
Snapshots approach comes with another benefit that is that it solves network and content stability issues. It does not matter how you implement snapshot tests, using the local web server or from inside the app - you will not depend on the real network anymore, so this can potentially make your tests less flaky and even a bit faster. Tomorrow when running tests your app will receive the same data as yesterday so you can be sure that if the test fails it's because of the app, not network or content changes. And when content really changes and you want to update your snapshots you just need to run the tests in record mode (making them work with the changed content so that they pass of course) and your snapshots will be updated without you ever touching snapshot files manually.
Tests performance
Now let's move on to the last problem - tests performance. Specifically repeating the same steps in different tests. Every time a user tries to access clinical records in the app we may ask them for their password. It is similar to how AppStore app asks you for your password or a fingerprint from time to time when you make a purchase. So we have to handle this in a lot of tests and spend quite some time on these otherwise useless steps.
To solve that we introduce shortcuts in the app which are only present when the app is built for the simulator. They work pretty much as feature toggles, just private and only available for our tests. We also use launch arguments to override some user defaults that we use in the app, for example, to check if we already showed onboarding screens or a screen that asks a user to enable push notifications.
This not only makes tests faster to run but also easier to write because we don't risk to forget to handle some alert or a popup after some step when they are disabled. Sometimes, like in push notifications tests, we do the opposite - we override defaults so that we force notifications screen to appear so that we make sure we enable notifications if this was never done on this device (i.e. after resetting simulators content).
We also use this approach to make the app to use memory storage instead of the keychain to store authentication token. This way we don't have to care about clearing any data from previous tests as each test will start with a completely fresh state.
Another case of performing repeated steps is when several tests need to perform the same steps to reach a particular state, for example, register a new user or book an appointment. This is probably the main factor that affects our tests performance right now. To solve that we are currently doing API calls to the backend from the test and then pass the data that we received to the app.
For example, when we need to register a new user at the beginning of the test we don't go through all registration steps every time. Instead, we make an API call to register a user with particular data and then we enter credentials we used for that on the login screen. We can even further speed it up by passing authorization token to the app via launch arguments so that it starts already in a logged in state, instead of going through the login screen. The same we can do with booking an appointment and other user actions, like adding a family member or a new payment method.
We are currently working on splitting our code base into SDKs and we plan to use these SDKs in our UI tests so that we also don't have to duplicate networking code in automation tests and authentication will be probably the first thing we will use it for.
We could even use API calls from tests to interact with GP portal instead of using mocked backend. This though will require us to first implement those APIs (which are designed first of all for a web app, not for tests), handle authentication and so on. But we then can use snapshots the same way as for calls made by our app. That's something we may switch to in future instead of using mock backend.
BDD-style tests
Finally, let's see now how our typical UI test looks like. Here is an example.
import XCTest
import XCTest_Gherkin

class MockServerTestExample: BaseFeature {

  override func setUp() {
    self.server.config.recordingMode = .replay
    super.setUp()
  }

  func testExample() {
    And("I tap the Get Started button")

    When("I enter my details")
    And("I accept terms and conditions")
    And("I tap on Lets go button")
    And("I accept privacy policy")

    Then("I see the home screen")
  }
}
As you can see it uses a mock server in replay mode and it's written in BDD style with clear given-when-then sections. It's also written in plain English which highly improves its readability. You can actually write it in any other language because these expressions are just plain strings. But at the same time, it is an absolutely valid Swift code.
This way each test is not just a set of some obscure Swift methods calls, it's a specification that is easy to understand for any member of your team, be it QA, developer or product owner. It also makes tests a better documentation of your product requirements, how it should behave.
To write tests like that we use a framework XCTest-Gherkin that gives us this simple and neat given-when-then DSL. "Gherkin" is a "Cucumber" in German and it's the name of this DSL. And Cucumber is one of the test tools that use this DSL. Calabash is another example of such a tool. Cucumber actually has its own Objective-C implementation of Gherkin parser, and there are few other open source libraries for iOS like Cucumberish.
Of course, by itself this test will not do anything. It will compile and run but it will fail on the first line because the Gherkin framework does not know what to do on this step. First, we need to implement the steps. Internally the Gherkin framework has a mapping between step expressions, which are just regular expressions, and their implementations, passed in as closures. Then when the step is invoked in tests using for example Given method, the string passed as a parameter to this method is matched with all available steps expressions and first matched step is invoked.
func defineSteps() {
  step("I launch the app") {
    XCUIApplication().launchIfNeeded()
  }

  step("I see the home screen") {
    XCTAssertTrue(TabBarMenu().isScreenDisplayed())
    XCTAssertTrue(TabBarMenu().isSelected(tabBarItem: .home))
    XCTAssertTrue(HomeScreen().isScreenDisplayed())
  }
}
To implement steps we use plain XCTest APIs with some helpers and a Page Object pattern. This allows us to make steps implementation highly readable too and makes our tests code very structured (you can argue if its a good structure but they are definitely structured). For each screen, we have a dedicated Page Object with the main goal to abstract interactions with XCUIElements and to hide implementations details. Each page object has a dedicated Steps Definer with implementations of steps related to this screen. These steps are used by tests which are grouped in Features, fancy name to call subclasses of XCTestCase.
class HomeScreen: BaseScreen {
fileprivate enum Views {
static let root = "homeRootView"
}
func isScreenDisplayed() -> Bool {
let rootView = app.otherElements[Views.root]
return tryWaitFor(element: rootView, withState: .exists)
}
}
class HomeScreenStepsDefiner: BaseSteps {
step("I see the home screen") {
XCTAssertTrue(HomeScreen().isScreenDisplayed())
}
}
class HomeScreenFeature: BaseFeature {
func test_view_default_home_screen() {}
func test_start_chat_from_home_screen() {}
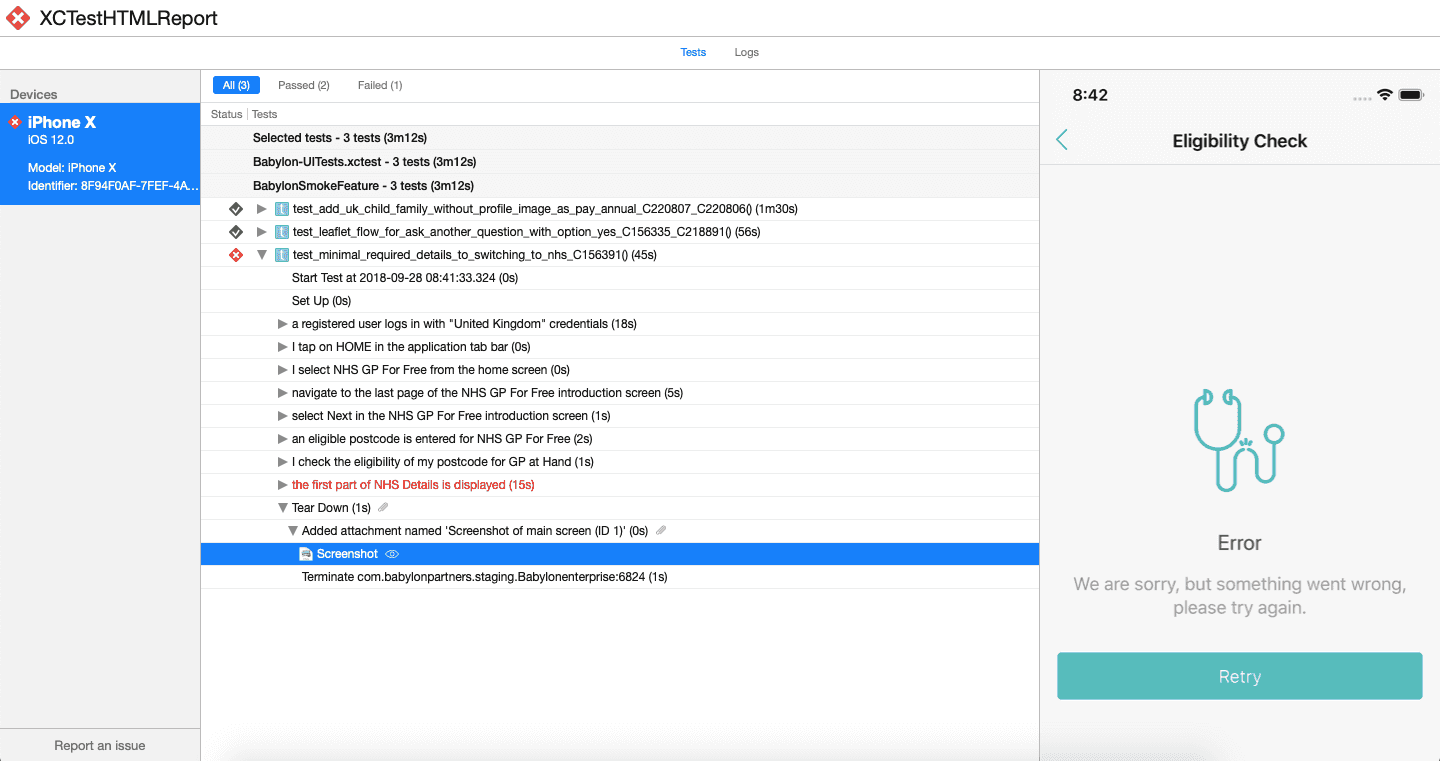
}Another nice feature of XCTest-Gherkin is that it automatically wraps steps into XCTActivity that can be seen in the test activity log. Each step starts a new activity which has the same name as step expression. This way the activity log looks exactly as our tests. And then we use XCTestHTMLReport to generate HTML reports which look exactly like activity logs in Xcode.
XCTest-Gherkin allows us to write very readable tests, but unfortunately, Xcode is not a great IDE to write such tests. There is no code completion for steps expression because they are just plain strings and there is no way to navigate from the test to the step implementation. Thankfully there are much better text editors like VSCode. It has a nice Gherkin plugin that works well with steps implemented basically with any BDD framework in any language, even with XCTest-Gherkin.
In VSCode you will not write a Swift test that you can run in Xcode, instead, it will be a feature file written in vanilla Gherkin language. Then you can write a simple test case in XCTest-Gherkin that will parse this feature file, convert it to native test cases and run them.
Unfortunately, you will not have a good debugging experience in this case as you will not be able to set breakpoints in test cases. VSCode has a plugin to compile Swift code but debugging tests is an issue that is still not solved.
For this, we can theoretically develop a code generator that will convert vanilla Gherkin feature files to XCTestCases which we can run and debug in Xcode. This way we can have the best of two worlds: nice editing experience of VSCode, debugging with Xcode and sharing feature files across teams. And as VSCode can compile your Swift code you will only need to switch to Xcode for debugging.
Alternatively one can develop a similar plugin for VSCode that will understand not just vanilla Gherkin but XCTest-Gherkin syntax. Then we wouldn't need to write feature files and generate Swift code from them.
This is not something that we use though, at least right now, because tools are not there yet so we have to live with the limitations of Xcode.
Wrap up
Now you know how local web server, snapshot tests and mock backend help us to solve some issues with UI tests. We are in the process of applying these approaches and currently have only few tests using snapshots and mocked backend but we already see how it enables us easily automate scenarious that we had to test manually before. If it proves to work well on a long run we will probably even opensource some of this code. And hopefully soon thanks to these techniques the only reason for our tests to fail will be developers being lazy to update them.
- https://techcrunch.com/2016/07/13/facebook-lifts-the-veil-on-its-mobile-device-lab">https://techcrunch.com/2016/07/13/facebook-lifts-the-veil-on-its-mobile-device-lab↩
- C. Montgomery Burns' Handbook of World Domination By Matt Groening.↩